
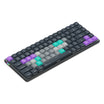
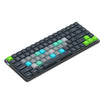
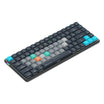

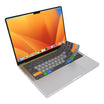
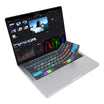
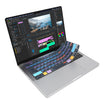
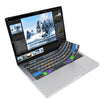

Dash
Wireless Shortcut Keyboard
User Guide
File Downloads
Click here to visit VIA and create custom layouts for your Dash. Click here to download the QMK Toolbox for reloading the firmware on your Dash.

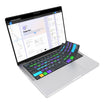
Connecting Your Dash
VIA (caniusevia.com) is an open source software that allows complete control over the functions performed by each key on the Dash. The first time you use VIA you'll need to complete a couple setup steps but after that you'll be able to connect and dive right in.
- Connect the Dash to your computer using the included USB-C cable.
- Open a Chrome based browser like Google Chrome or Microsoft Edge and visit usevia.app.
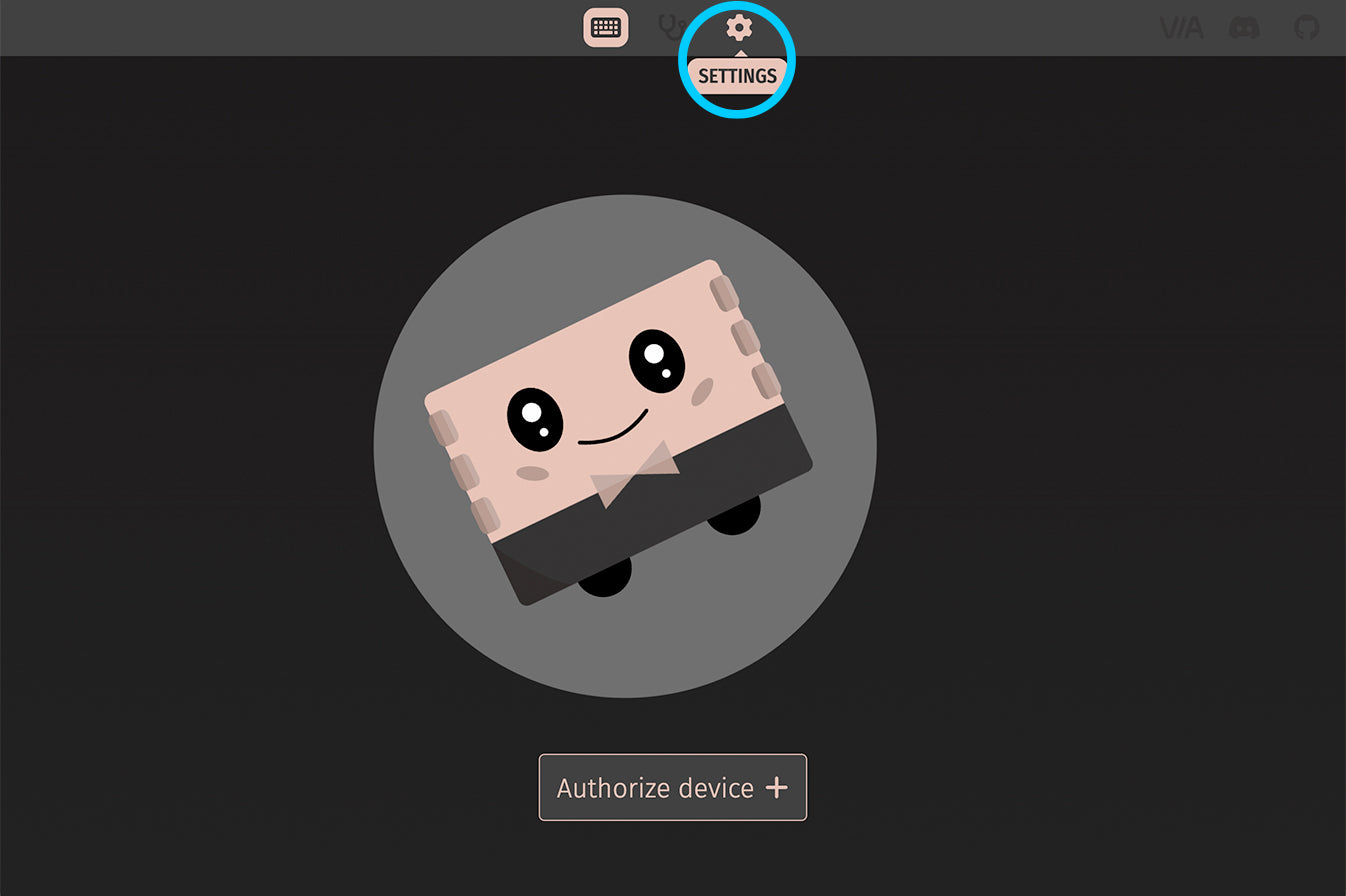
- Select the Settings Tab (Gear icon).

- Toggle on “Show Design Tab” to show the Design Tab (Paintbrush icon).
- Select the Design tab (Paintbrush icon).
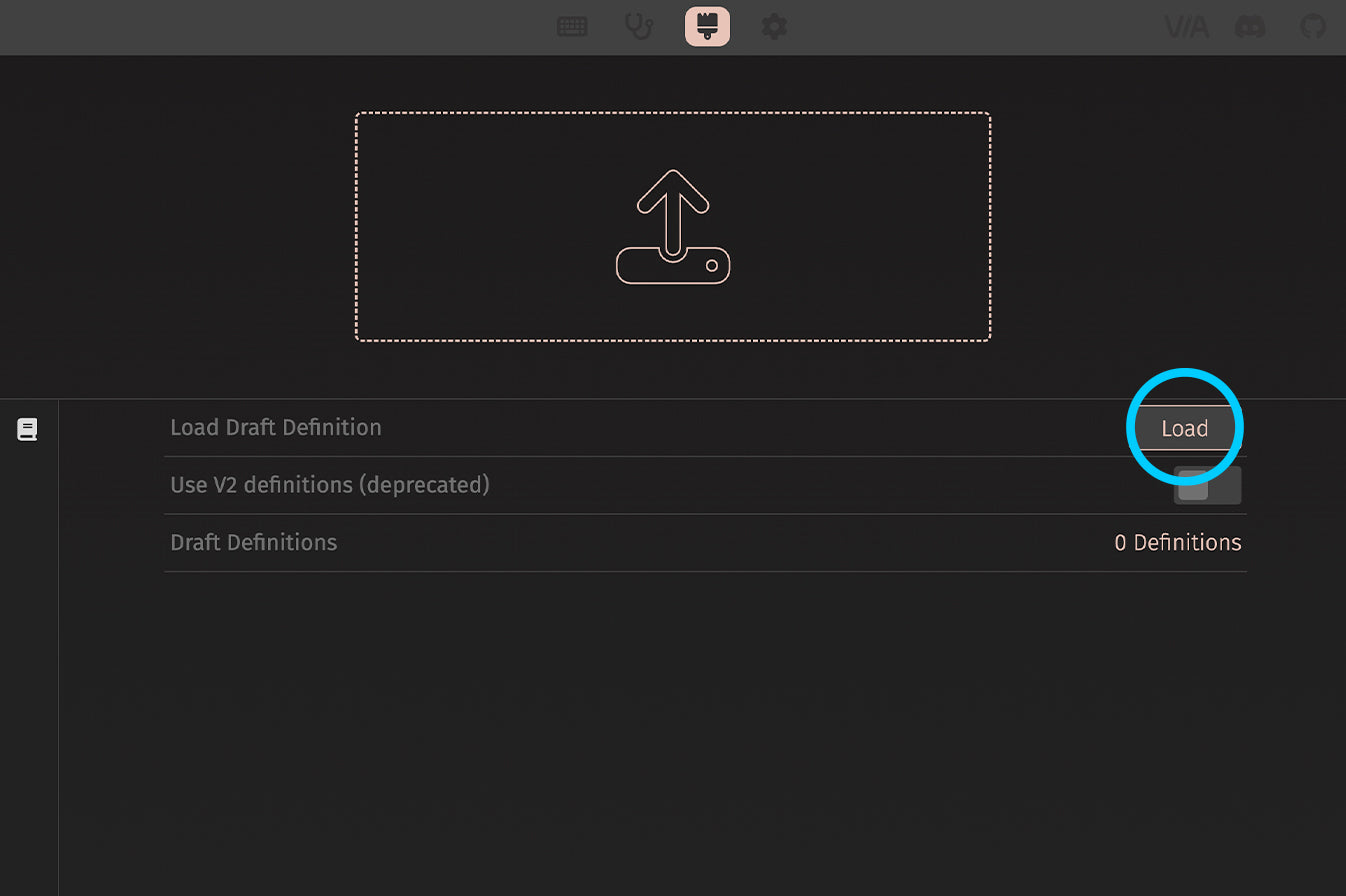
- Navigate to the Design tab (Paintbrush icon) and load the draft definition file downloaded here.
- Once the file loads you should see the Dash keyboard layout at the top of the screen and the initial setup is complete (this only needs to be done once).

- Select the Configure tab (Keyboard icon).
- Then click the "Authorize device" button to show a list of the connect VIA compatible devices.
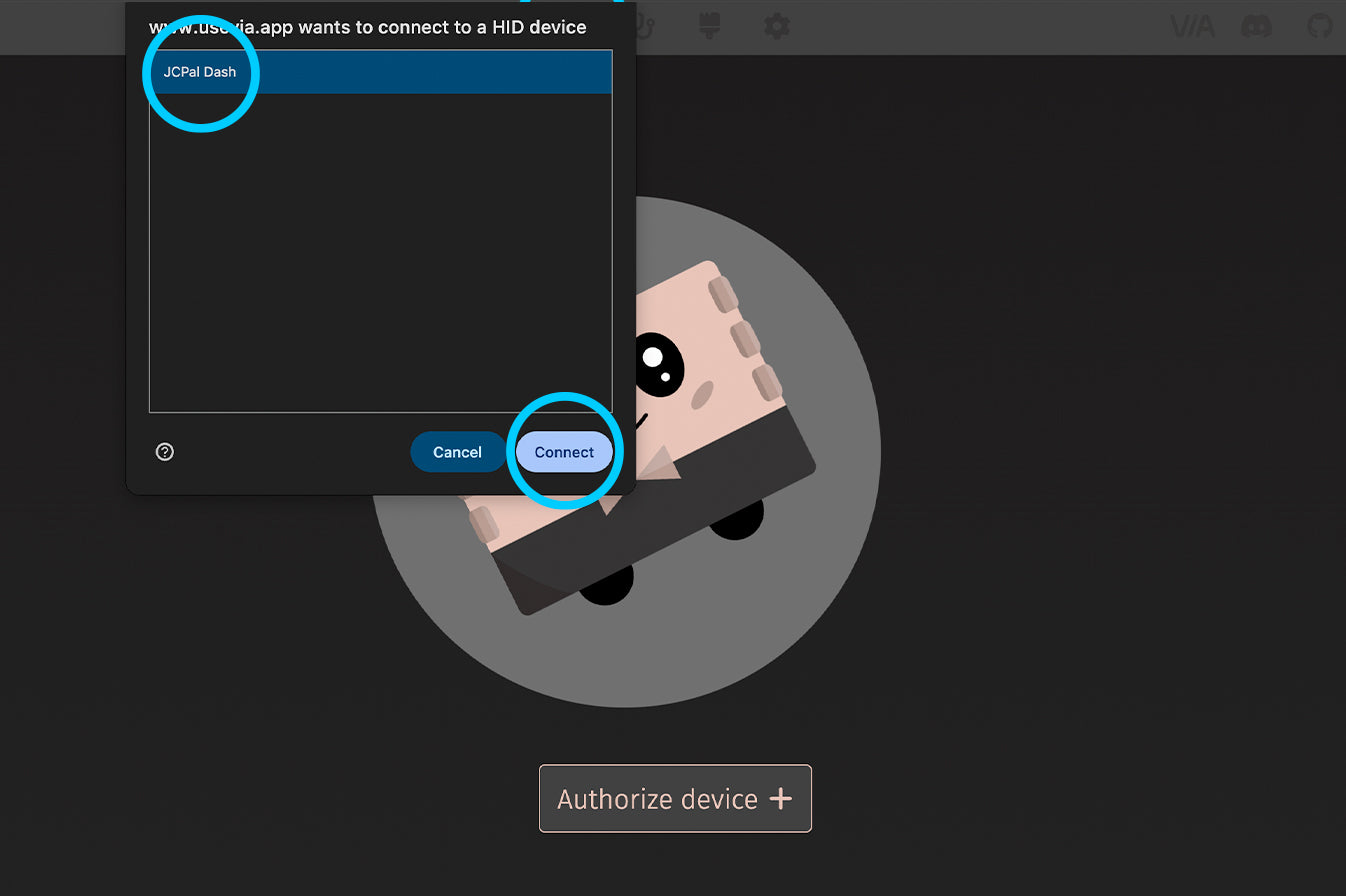
- Select "JCPal Dash" from the list of devices then click "Connect".
- The Configure page should automatically load, but if not try refreshing the page and connecting again. If you have trouble please contact us.

Once the layout loads you're ready to dive in and start customizing your Dash!
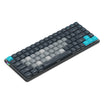
Note: On the Settings page (Gear icon) you can select different colour keycap themes for VIA. We recommend the "Navy Blue A" (shown below) theme as this will more clearly show the different key zones on the Dash.
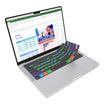
Customizing Your Dash
You can get creative in VIA and program complex functions across Dash’s four key layers to support your workflow (up to 16 Macros can be created). The customisations you make are stored on the Dash so they’ll work on any computer you connect to without any additional software required.
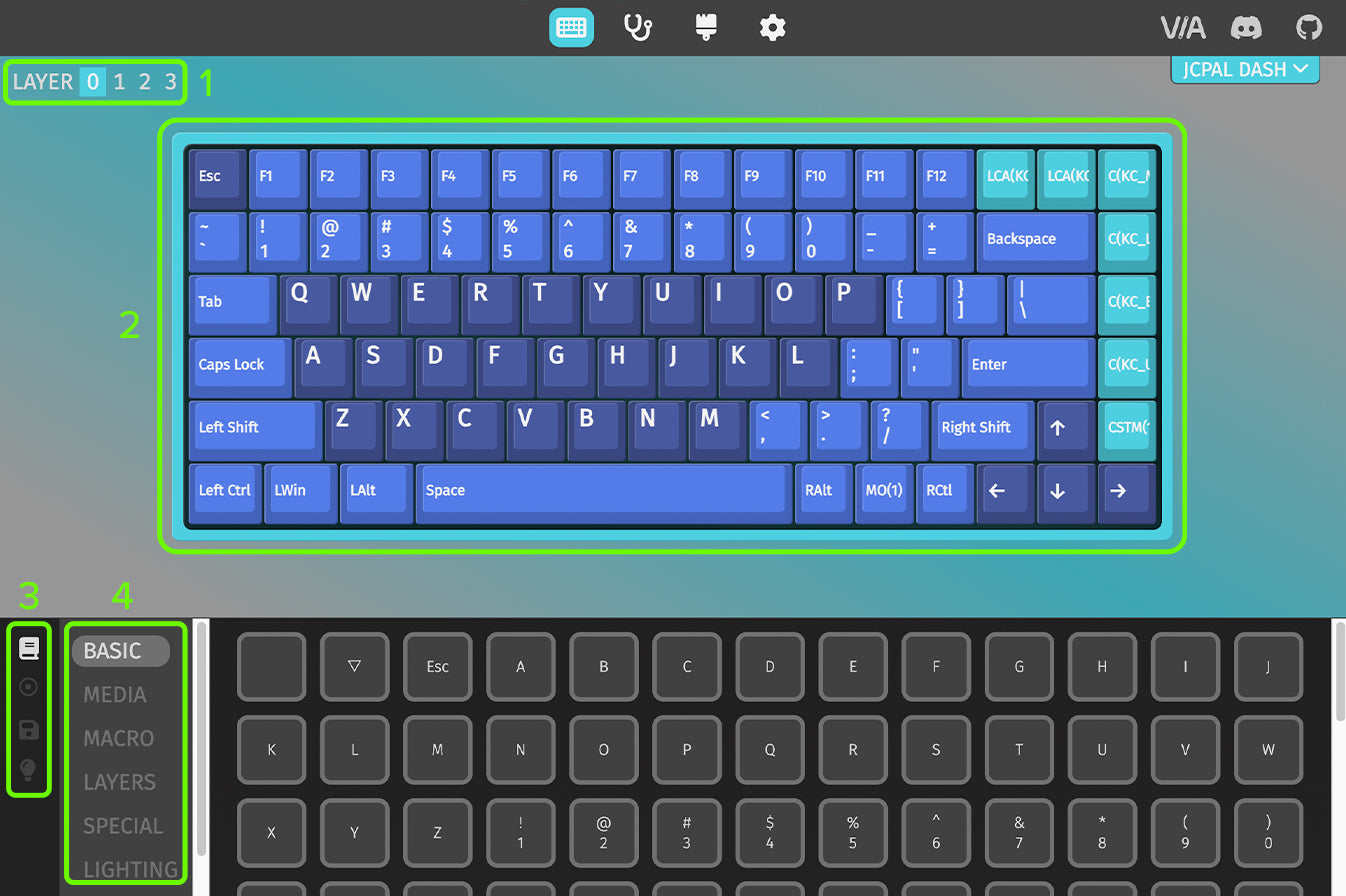
When you first load VIA you'll see a number of things:
1. At the top left it will show the currently displayed layer.
2. The keyboard displays the current function assignments to each key.
3. These 4 icons allow you to access the 4 main VIA controls tabs.
4. This list shows the functions that can be assigned to any key on the Dash.
Note: You can switch between the layers on the keyboard by using the MAC | WIN switch on the back of your Dash (layers 0 / 2), or by holding down the FN key (layers 1 / 3).

- To change a keys function, first select the appropriate layer and then the key you want to customize.
- Once highlighted, select any function from the list in menu #4 to automatically apply the new function to the selected key.
- For this example, we're doing to create a Macro so we can assign a new shortcut. To do this we'll select the Macro option in menu #4, then select one of the Macro numbers to assign this Macro to the key.
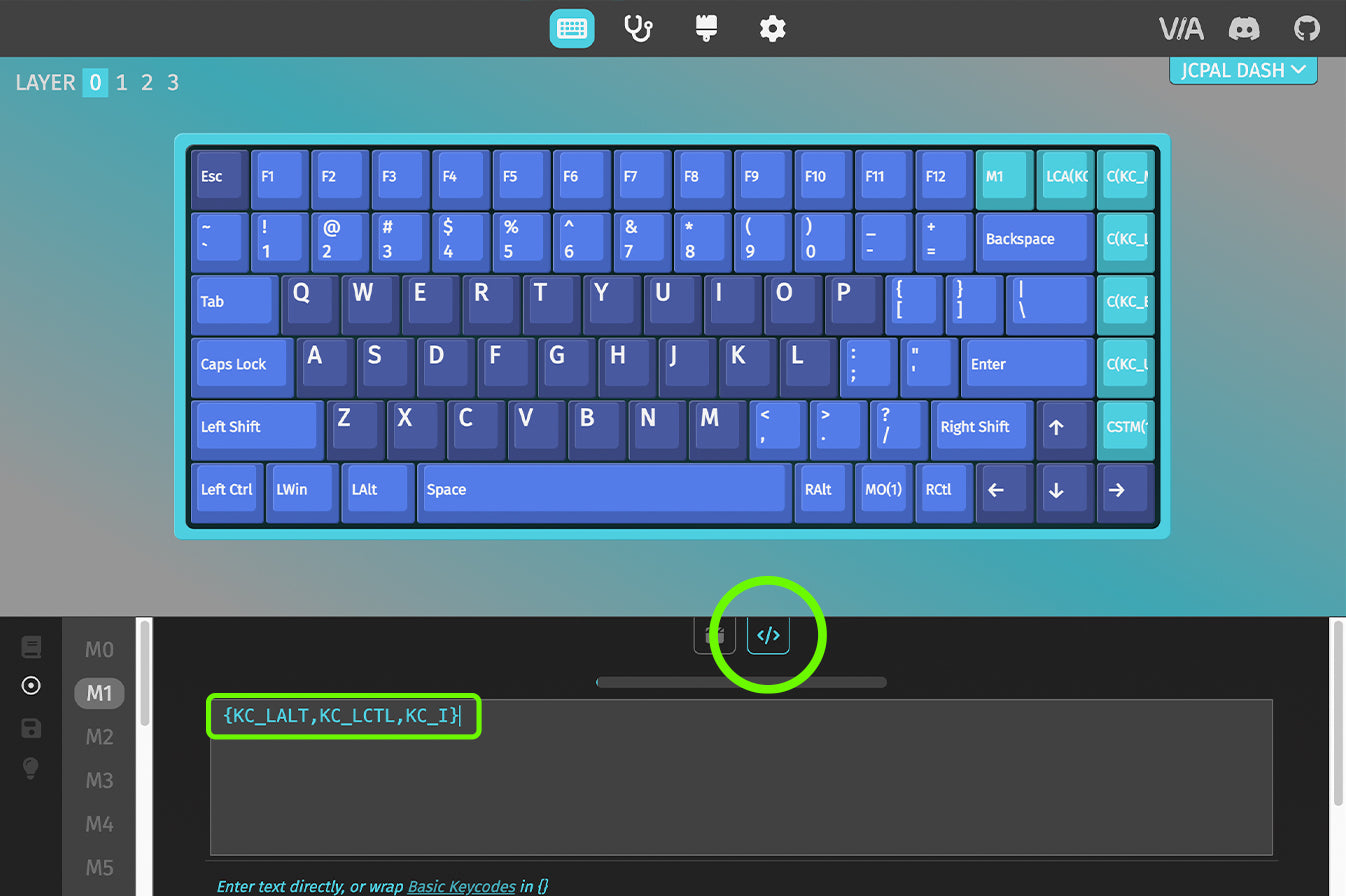
- Once a Macro is assigned to a key (in this example we're using "M1") you can assign a function to the Macro. In Menu #4 select the Macro tab, then scroll down to the Macro you want to edit.
- There are two ways to enter your Macro - you can record it (press Record then simply press the keys/shortcut you want and you'll see them appear in the window, pressing stop when complete). Alternatively you can select the Code tab and copy+paste the VIA code form the tab below for your preferred shortcut. Click "Save" to assign the function and make it active on your Dash.
Shortcut Macros
Dash is pre-programmed with seven shortcut hotkeys that allow you to perform multi-key combinations with one button press. These are setup as macros on the top right seven keys on the Dash. To setup a new shortcut hotkey, or swap one of the existing hotkeys, you can use the macro codes below in VIA to apply the function to the desired key.
Photoshop
| Shortcut Hotkey | Description | MacOS VIA Macro | Windows VIA Macro |
|---|---|---|---|
| Canvas Size | Opens the Canvas Size adjustment window |
VIA Code copied: {KC_LALT,KC_LGUI,KC_C}
|
VIA Code copied: {KC_LALT,KC_LCTL,KC_C}
|
| Image Size | Opens the Image Size adjustment window |
VIA Code copied: {KC_LALT,KC_LGUI,KC_I}
|
VIA Code copied: {KC_LALT,KC_LCTL,KC_I}
|
| Curves | Opens the Curves adjustment window |
VIA Code copied: {KC_LGUI,KC_M}
|
VIA Code copied: {KC_LCTL,KC_M}
|
| Levels | Opens the Levels adjustment window |
VIA Code copied: {KC_LGUI,KC_L}
|
VIA Code copied: {KC_LCTL,KC_L}
|
| Color Balance | Opens the Color Balance adjustment window |
VIA Code copied: {KC_LGUI,KC_B}
|
VIA Code copied: {KC_LCTL,KC_B}
|
| Hue/Saturation | Opens the Hue/Saturation adjustment window |
VIA Code copied: {KC_LGUI,KC_U}
|
VIA Code copied: {KC_LCTL,KC_U}
|
| Rulers & Guides | Toggles on/off the Rulers and Guides |
VIA Code copied: {KC_LGUI,KC_R} or {KC_LGUI,KC_SCLN}
|
VIA Code copied: {KC_LCTL,KC_R} or {KC_LCTL,KC_SCLN}
|
| New Layer | Opens the New Layer dialogue box |
VIA Code copied: {KC_LGUI,KC_LSFT,KC_N}
|
VIA Code copied: {KC_LCTL,KC_LSFT,KC_N}
|
| Merge Down | Merges the active layer with the layer below |
VIA Code copied: {KC_LGUI,KC_E}
|
VIA Code copied: {KC_LCTL,KC_E}
|
| Invert Layer | Inverts the colors in the active layer |
VIA Code copied: {KC_LGUI,KC_I}
|
VIA Code copied: {KC_LCTL,KC_I}
|
| Soften Brush | Lowers the brush Hardness level |
VIA Code copied: {KC_LSFT,KC_LBRC}
|
VIA Code copied: {KC_LSFT,KC_LBRC}
|
| Harden Brush | Increases the brush Hardness level |
VIA Code copied: {KC_LSFT,KC_RBRC}
|
VIA Code copied: {KC_LSFT,KC_RBRC}
|
| Next Blend Mode | Change to the next Blending Mode |
VIA Code copied: {KC_LSFT,KC_EQL}
|
VIA Code copied: {KC_LSFT,KC_EQL}
|
| Prev. Blend Mode | Change to the previous Blending Mode |
VIA Code copied: {KC_LSFT,KC_MINS}
|
VIA Code copied: {KC_LSFT,KC_MINS}
|
| Group | Group the selected layers |
VIA Code copied: {KC_LGUI,KC_G}
|
VIA Code copied: {KC_LCTL,KC_G}
|
| Ungroup | Ungroup the selected layer group |
VIA Code copied: {KC_LGUI,KC_LSFT,KC_G}
|
VIA Code copied: {KC_LCTL,KC_LSFT,KC_G}
|
| Inverse Selection | Select the inverse area of the current selection |
VIA Code copied: {KC_LGUI,KC_LSFT,KC_I}
|
VIA Code copied: {KC_LCTL,KC_LSFT,KC_I}
|
| Undo Step | Undo the last action |
VIA Code copied: {KC_LGUI,KC_Z}
|
VIA Code copied: {KC_LCTL,KC_Z}
|
| Redo Step | Redo the last undone action |
VIA Code copied: {KC_LGUI,KC_LSFT,KC_S}
|
VIA Code copied: {KC_LCTL,KC_LSFT,KC_S}
|
| Zoom Out | Zoom out of the canvas |
VIA Code copied: {KC_LGUI,KC_MINS}
|
VIA Code copied: {KC_LCTL,KC_EQL}
|
| Zoom In | Zoom in to the canvas |
VIA Code copied: {KC_LGUI,KC_EQL}
|
VIA Code copied: {KC_LCTL,KC_MINS}
|
| Save | Saves the currently open file |
VIA Code copied: {KC_LGUI,KC_S}
|
VIA Code copied: {KC_LCTL,KC_S}
|
Premiere Pro
| Shortcut Hotkey | Description | MacOS VIA Macro | Windows VIA Macro |
|---|---|---|---|
| New Project | Create a new Project |
VIA Code copied: {KC_LALT,KC_LGUI,KC_N}
|
VIA Code copied: {KC_LCTL,KC_LALT,KC_N}
|
| New Sequence | Create a new Sequence |
VIA Code copied: {KC_LGUI,KC_N}
|
VIA Code copied: {KC_LCTL,KC_N}
|
| Ripple Delete | Delete clip and close gap |
VIA Code copied: {KC_LALT,KC_BSPC}
|
VIA Code copied: {KC_LALT,KC_BSPC}
|
| Toggle Clip | Toggle a clip on/off |
VIA Code copied: {KC_LSFT,KC_LGUI,KC_E}
|
VIA Code copied: {KC_LSFT,KC_E}
|
| Apply Transition | Apply a video transition |
VIA Code copied: {KC_LGUI,KC_D}
|
VIA Code copied: {KC_LCTL,KC_D}
|
| Add Edit | Add an edit at the playhead position |
VIA Code copied: {KC_LGUI,KC_K}
|
VIA Code copied: {KC_LCTL,KC_K}
|
| Audio Transition | Apply an audio transition |
VIA Code copied: {KC_LSFT,KC_LGUI,KC_D}
|
VIA Code copied: {KC_LCTL,KC_LSFT,KC_D}
|
| Duplicate | Duplicate item |
VIA Code copied: {KC_LSFT,KC_LGUI,KC_SLSH}
|
VIA Code copied: {KC_LCTL,KC_LSFT,KC_SLSH}
|
| Group Clips | Group selected clips |
VIA Code copied: {KC_LGUI,KC_G}
|
VIA Code copied: {KC_LCTL,KC_G}
|
| Add Caption Track | Add a new caption track |
VIA Code copied: {KC_LALT,KC_LGUI,KC_A}
|
VIA Code copied: {KC_LCTL,KC_LALT,KC_A}
|
| Add Caption At Playhead | Add a new caption at the playhead position |
VIA Code copied: {KC_LALT,KC_LGUI,KC_C}
|
VIA Code copied: {KC_LCTL,KC_LALT,KC_C}
|
| Rev. Match Frame | Reverse Match Frame |
VIA Code copied: {KC_LSFT,KC_R}
|
VIA Code copied: {KC_LSFT,KC_R}
|
| Ungroup Clips | Ungroup selected clip group |
VIA Code copied: {KC_LSFT,KC_LGUI,KC_G}
|
VIA Code copied: {KC_LCTL,KC_LSFT,KC_G}
|
| Next Caption | Go to next caption segment |
VIA Code copied: {KC_LALT,KC_LGUI,KC_DOWN}
|
VIA Code copied: {KC_LCTL,KC_LALT,KC_DOWN}
|
| Previous Caption | Go to previous caption segment |
VIA Code copied: {KC_LALT,KC_LGUI,KC_UP}
|
VIA Code copied: {KC_LCTL,KC_LALT,KC_UP}
|
| Make Subsequence | Make subsequence |
VIA Code copied: {KC_LGUI,KC_U}
|
VIA Code copied: {KC_LCTL,KC_U}
|
| Default Transition | Apply Default Transitions to Selection |
VIA Code copied: {KC_LSFT,KC_D}
|
VIA Code copied: {KC_LSFT,KC_D}
|
| Speed/Duration | Edit the clip speed/duration |
VIA Code copied: {KC_LGUI,KC_R}
|
VIA Code copied: {KC_LCTL,KC_R}
|
| Del. Markers | Clear all the markers |
VIA Code copied: {KC_LALT,KC_LGUI,KC_M}
|
VIA Code copied: {KC_LCTL,KC_LALT,KC_LSFT,KC_M}
|
| Clear In/Out | Clear the in/out points |
VIA Code copied: {KC_LALT,KC_X}
|
VIA Code copied: {KC_LCTL,KC_LSFT,KC_X}
|
| Make Subclip | Make a subclip |
VIA Code copied: {KC_LGUI,KC_U}
|
VIA Code copied: {KC_LCTL,KC_U}
|
| Edit All Tracks | Apply edit to all tracks at playhead position |
VIA Code copied: {KC_LSFT,KC_LGUI,KC_K}
|
VIA Code copied: {KC_LCTL,KC_LSFT,KC_K}
|
Lightroom
| Shortcut Hotkey | Description | MacOS VIA Macro | Windows VIA Macro |
|---|---|---|---|
| Auto Settings | Automatically adjusts the tone of the image to improve balance |
VIA Code copied: {KC_LGUI,KC_U}
|
VIA Code copied: {KC_LCTL,KC_U}
|
| Auto White Bal. | Automatically adjusts the white balance of the image |
VIA Code copied: {KC_LGUI,KC_LSFT,KC_U}
|
VIA Code copied: {KC_LCTL,KC_LSFT,KC_U}
|
| Edit in Photoshop | Edit the currently selected image in Photoshop |
VIA Code copied: {KC_LGUI,KC_E}
|
VIA Code copied: {KC_LCTL,KC_E}
|
| New Snapshot | Create a new snapshot of the selected image's settings |
VIA Code copied: {KC_LGUI,KC_N}
|
VIA Code copied: {KC_LCTL,KC_N}
|
| New Mask | Toggle the Masking menu |
VIA Code copied: {KC_LSFT,KC_W}
|
VIA Code copied: {KC_LSFT,KC_W}
|
| Copy Settings | Open the Copy Settings dialogue box |
VIA Code copied: {KC_LGUI,KC_LSFT,KC_C}
|
VIA Code copied: {KC_LCTL,KC_LSFT,KC_C}
|
| Paste Settings | Apply the copied settings to the selected image |
VIA Code copied: {KC_LGUI,KC_LSFT,KC_V}
|
VIA Code copied: {KC_LCTL,KC_LSFT,KC_V}
|
| Export | Export the selected photo(s) |
VIA Code copied: {KC_LGUI,KC_LSFT,KC_E}
|
VIA Code copied: {KC_LCTL,KC_LSFT,KC_E}
|
| Reset Settings | Reset all settings for the currently selected image |
VIA Code copied: {KC_LGUI,KC_LSFT,KC_R}
|
VIA Code copied: {KC_LCTL,KC_LSFT,KC_R}
|
| Enhance Photo | Open the Enhance settings to improve the image quality using AI |
VIA Code copied: {KC_LCTL,KC_LALT,KC_I}
|
VIA Code copied: {KC_LCTL,KC_LALT,KC_I}
|
| Print Module | Go to the Print Module |
VIA Code copied: {KC_LGUI,KC_LALT,KC_6}
|
VIA Code copied: {KC_LCTL,KC_LALT,KC_6}
|
| Reset Crop | Reset the crop of the selected image |
VIA Code copied: {KC_LGUI,KC_LALT,KC_R}
|
VIA Code copied: {KC_LCTL,KC_LALT,KC_R}
|
| Radial Gradient | Create a new Radial Gradient Mask |
VIA Code copied: {KC_LSFT,KC_M}
|
VIA Code copied: {KC_LSFT,KC_M}
|
| Import | Import Photos and Videos |
VIA Code copied: {KC_LGUI,KC_LSFT,KC_I}
|
VIA Code copied: {KC_LCTL,KC_LSFT,KC_I}
|
| Toggle Filter | Toggle the Filters On/Off |
VIA Code copied: {KC_LGUI,KC_L}
|
VIA Code copied: {KC_LCTL,KC_L}
|
| Zoom Out | Zoom out from the image |
VIA Code copied: {KC_LGUI,KC_MINS}
|
VIA Code copied: {KC_LCTL,KC_MINS}
|
| Zoom In | Zoom in to the image |
VIA Code copied: {KC_LGUI,KC_EQL}
|
VIA Code copied: {KC_LCTL,KC_EQL}
|
| Rotate Left | Rotate the photo left (Counterclockwise) |
VIA Code copied: {KC_LGUI,KC_LBRC}
|
VIA Code copied: {KC_LCTL,KC_LBRC}
|
| Rotate Right | Rotate the photo right (Clockwise) |
VIA Code copied: {KC_LGUI,KC_RBRC}
|
VIA Code copied: {KC_LCTL,KC_RBRC}
|
| Save Quick Collection | Open the Save Quick Collection dialogue box |
VIA Code copied: {KC_LGUI,KC_LALT,KC_B}
|
VIA Code copied: {KC_LCTL,KC_LALT,KC_B}
|
| Undo Action | Undo the last action |
VIA Code copied: {KC_LGUI,KC_Z}
|
VIA Code copied: {KC_LCTL,KC_Z}
|
| Redo Action | Redo the last undo action |
VIA Code copied: {KC_LGUI,KC_LSFT,KC_S}
|
VIA Code copied: {KC_LCTL,KC_LSFT,KC_S}
|
Final Cut Pro
| Shortcut Hotkey | Description | MacOS VIA Macro |
|---|---|---|
| Compound Clip | Create a New Compound Clip |
VIA Code copied: {KC_LALT,KC_G}
|
| Enhance Light & Color | Automatically enhances the Light and Color in your clips (Final Cut Pro 10.8 and newer) |
VIA Code copied: {KC_LCTL,KC_LALT,KC_LGUI,KC_O}
|
| Project Snapshot | Take a Snapshot of the current Project, saving its current state within the Project file |
VIA Code copied: {KC_LSFT,KC_LGUI,KC_D}
|
| Paste Attributes | Paste copied attributes and their settings to the selection |
VIA Code copied: {KC_LSFT,KC_LGUI,KC_V}
|
| Cut Clips At Playhead | Cut all clips at the skimmer or playhead location |
VIA Code copied: {KC_LSFT,KC_LGUI,KC_B}
|
| Undo Action | Undo the last command |
VIA Code copied: {KC_LGUI,KC_Z}
|
| Redo Action | Redo the last command |
VIA Code copied: {KC_LGUI,KC_LSFT,KC_S}
|
| Toggle Library | Toggle Show/Hide the Library & Browser module |
VIA Code copied: {KC_LCTL,KC_LGUI,KC_1}
|
| Time to Range | Trims the clip start and end points to match the range selection. |
VIA Code copied: {KC_LALT,KC_BSLS}
|
| Create Storyline | Create a storyline from a selection of connected clips that don’t overlap |
VIA Code copied: {KC_LGUI,KC_G}
|
| Play Full Screen | Play full screen from the skimmer or playhead position |
VIA Code copied: {KC_LSFT,KC_LGUI,KC_F}
|
| Import Media | Opens the Media Import dialogue box |
VIA Code copied: {KC_LGUI,KC_I}
|
| New Event | Creates a new event |
VIA Code copied: {KC_LALT,KC_N}
|
| New Project | Creates a new project |
VIA Code copied: {KC_LGUI,KC_N}
|
| Export File | Opens the Export File dialogue box |
VIA Code copied: {KC_LGUI,KC_E}
|
| Timeline Scrolling | Scrolls the timeline in line with the playhead during playback |
VIA Code copied: {KC_LALT,KC_LSFT,KC_S}
|
| Transitions Browser | Toggle Show/Hide the Transitions Browser |
VIA Code copied: {KC_LCTL,KC_LGUI,KC_5}
|
| Retime Edit | Toggle Show/Hide the Retime Editor |
VIA Code copied: {KC_LGUI,KC_R}
|
| Zoom In Timeline | Zoom in to the browser, viewer, or timeline |
VIA Code copied: {KC_LGUI,KC_EQL}
|
| Zoom Out Timeline | Zoom out of the browser, viewer, or timeline |
VIA Code copied: {KC_LGUI,KC_MINS}
|
| Add Connect Title | Connect a basic title to the primary storyline |
VIA Code copied: {KC_LCTL,KC_T}
|
| Insert Gap Clip | Inserts a gap clip at the skimmer or playhead location |
VIA Code copied: {KC_LALT,KC_W}
|
Davinci
| Shortcut Hotkey | Description | MacOS VIA Macro | Windows VIA Macro |
|---|---|---|---|
| Copy Attributes | Copy a clip/object or its attributes |
VIA Code copied: {KC_LGUI,KC_C}
|
VIA Code copied: {KC_LCTL,KC_C}
|
| Paste Attributes | Open Paste Attributes dialogue box, allowing you to paste specific settings |
VIA Code copied: {KC_LALT, KC_V}
|
VIA Code copied: {KC_LALT,KC_V}
|
| Split Clip | Split all the clips at the playhead position |
VIA Code copied: {KC_LGUI,KC_BSLS}
|
VIA Code copied: {KC_LCTL,KC_BSLS}
|
| Timeline Zoom | Toggle between showing the timeline in its entirety and the previous timeline zoom level |
VIA Code copied: {KC_LSFT,KC_Z}
|
VIA Code copied: {KC_LSFT,KC_Z}
|
| Transition | Add a transition at the selected edit points |
VIA Code copied: {KC_LGUI,KC_T}
|
VIA Code copied: {KC_LCTL,KC_T}
|
| Undo Step | Undo the last action |
VIA Code copied: {KC_LGUI,KC_Z}
|
VIA Code copied: {KC_LCTL,KC_Z}
|
| Redo Step | Redo the last undone action |
VIA Code copied: {KC_LGUI,KC_LSFT,KC_Z}
|
VIA Code copied: {KC_LCTL,KC_LSFT,KC_Z}
|
| Join Clips | Join the selected clips |
VIA Code copied: {KC_LALT,KC_BSLS}
|
VIA Code copied: {KC_LALT,KC_BSLS}
|
| Select All Clips Forward | Select all clips (on all tracks) after the playhead position |
VIA Code copied: {KC_LALT,KC_Y}
|
VIA Code copied: {KC_LALT,KC_Y}
|
| Link Clips | Link all the selected clips |
VIA Code copied: {KC_LALT,KC_LGUI,KC_L}
|
VIA Code copied: {KC_LALT,KC_LCTL,KC_L}
|
| Video Scopes | Toggle on/off the Video Scopes window |
VIA Code copied: {KC_LGUI,KC_LSFT,KC_W}
|
VIA Code copied: {KC_LCTL,KC_LSFT,KC_W}
|
| New Bin | Create a new bin (in Media panel) |
VIA Code copied: {KC_LGUI,KC_LSFT,KC_N}
|
VIA Code copied: {KC_LCTL,KC_LSFT,KC_N}
|
| New Timeline | Create a new timeline (in the Cut, Edit, or Fairlight panels) |
VIA Code copied: {KC_LGUI,KC_N}
|
VIA Code copied: {KC_LCTL,KC_N}
|
| Retime Controls | Toggle the Retime controls for the selected clip (in the Edit panel) |
VIA Code copied: {KC_LGUI,KC_R}
|
VIA Code copied: {KC_LCTL,KC_R}
|
| Ripple Overwrite | Perform a ripple overwrite |
VIA Code copied: {KC_LSFT, KC_F10}
|
VIA Code copied: {KC_LSFT, KC_F10}
|
| Trim Start | Trim the start of the clip to the playhead position |
VIA Code copied: {KC_LSFT, KC_LBRC}
|
VIA Code copied: {KC_LSFT, KC_LBRC}
|
| Trim End | Trim the end of the clip to the playhead position |
VIA Code copied: {KC_LSFT, KC_RBRC}
|
VIA Code copied: {KC_LSFT, KC_RBRC}
|
| Previous Node | Move to the previous node (Color panel) |
VIA Code copied: {KC_LALT,KC_LSFT,KC_SCLN}
|
VIA Code copied: {KC_LALT,KC_LSFT,KC_SCLN}
|
| Next Node | Move to the next node (Color panel) |
VIA Code copied: {KC_LALT,KC_LSFT,KC_QUOT}
|
VIA Code copied: {KC_LALT,KC_LSFT,KC_QUOT}
|
| Add Node | Add a new serial node after the selected node (Color panel) |
VIA Code copied: {KC_LALT,KC_S}
|
VIA Code copied: {KC_LALT,KC_S}
|
| Toggle Node | Toggle the selected Node on or off (Color panel) |
VIA Code copied: {KC_LGUI,KC_D}
|
VIA Code copied: {KC_LCTL,KC_D}
|
| Play In to Out | Play the timeline from the In to Out range |
VIA Code copied: {KC_LALT,KC_SLSH}
|
VIA Code copied: {KC_LALT,KC_SLSH}
|
| Shortcut Hotkey | Description | MacOS VIA Macro | Windows VIA Macro |
|---|---|---|---|
| Canvas Size | Opens the Canvas Size adjustment window |
VIA Code copied: {KC_LALT,KC_LGUI,KC_C}
|
VIA Code copied: {KC_LALT,KC_LCTL,KC_C}
|
| Image Size | Opens the Image Size adjustment window |
VIA Code copied: {KC_LALT,KC_LGUI,KC_I}
|
VIA Code copied: {KC_LALT,KC_LCTL,KC_I}
|
| Curves | Opens the Curves adjustment window |
VIA Code copied: {KC_LGUI,KC_M}
|
VIA Code copied: {KC_LCTL,KC_M}
|
| Levels | Opens the Levels adjustment window |
VIA Code copied: {KC_LGUI,KC_L}
|
VIA Code copied: {KC_LCTL,KC_L}
|
| Color Balance | Opens the Color Balance adjustment window |
VIA Code copied: {KC_LGUI,KC_B}
|
VIA Code copied: {KC_LCTL,KC_B}
|
| Hue/Saturation | Opens the Hue/Saturation adjustment window |
VIA Code copied: {KC_LGUI,KC_U}
|
VIA Code copied: {KC_LCTL,KC_U}
|
| Rulers & Guides | Toggles on/off the Rulers and Guides |
VIA Code copied: {KC_LGUI,KC_R} or {KC_LGUI,KC_SCLN}
|
VIA Code copied: {KC_LCTL,KC_R} or {KC_LCTL,KC_SCLN}
|
| New Layer | Opens the New Layer dialogue box |
VIA Code copied: {KC_LGUI,KC_LSFT,KC_N}
|
VIA Code copied: {KC_LCTL,KC_LSFT,KC_N}
|
| Merge Down | Merges the active layer with the layer below |
VIA Code copied: {KC_LGUI,KC_E}
|
VIA Code copied: {KC_LCTL,KC_E}
|
| Invert Layer | Inverts the colors in the active layer |
VIA Code copied: {KC_LGUI,KC_I}
|
VIA Code copied: {KC_LCTL,KC_I}
|
| Soften Brush | Lowers the brush Hardness level |
VIA Code copied: {KC_LSFT,KC_LBRC}
|
VIA Code copied: {KC_LSFT,KC_LBRC}
|
| Harden Brush | Increases the brush Hardness level |
VIA Code copied: {KC_LSFT,KC_RBRC}
|
VIA Code copied: {KC_LSFT,KC_RBRC}
|
| Next Blend Mode | Change to the next Blending Mode |
VIA Code copied: {KC_LSFT,KC_EQL}
|
VIA Code copied: {KC_LSFT,KC_EQL}
|
| Prev. Blend Mode | Change to the previous Blending Mode |
VIA Code copied: {KC_LSFT,KC_MINS}
|
VIA Code copied: {KC_LSFT,KC_MINS}
|
| Group | Group the selected layers |
VIA Code copied: {KC_LGUI,KC_G}
|
VIA Code copied: {KC_LCTL,KC_G}
|
| Ungroup | Ungroup the selected layer group |
VIA Code copied: {KC_LGUI,KC_LSFT,KC_G}
|
VIA Code copied: {KC_LCTL,KC_LSFT,KC_G}
|
| Inverse Selection | Select the inverse area of the current selection |
VIA Code copied: {KC_LGUI,KC_LSFT,KC_I}
|
VIA Code copied: {KC_LCTL,KC_LSFT,KC_I}
|
| Undo Step | Undo the last action |
VIA Code copied: {KC_LGUI,KC_Z}
|
VIA Code copied: {KC_LCTL,KC_Z}
|
| Redo Step | Redo the last undone action |
VIA Code copied: {KC_LGUI,KC_LSFT,KC_S}
|
VIA Code copied: {KC_LCTL,KC_LSFT,KC_S}
|
| Zoom Out | Zoom out of the canvas |
VIA Code copied: {KC_LGUI,KC_MINS}
|
VIA Code copied: {KC_LCTL,KC_EQL}
|
| Zoom In | Zoom in to the canvas |
VIA Code copied: {KC_LGUI,KC_EQL}
|
VIA Code copied: {KC_LCTL,KC_MINS}
|
| Save | Saves the currently open file |
VIA Code copied: {KC_LGUI,KC_S}
|
VIA Code copied: {KC_LCTL,KC_S}
|
| Shortcut Hotkey | Description | MacOS VIA Macro | Windows VIA Macro |
|---|---|---|---|
| New Project | Create a new Project |
VIA Code copied: {KC_LALT,KC_LGUI,KC_N}
|
VIA Code copied: {KC_LCTL,KC_LALT,KC_N}
|
| New Sequence | Create a new Sequence |
VIA Code copied: {KC_LGUI,KC_N}
|
VIA Code copied: {KC_LCTL,KC_N}
|
| Ripple Delete | Delete clip and close gap |
VIA Code copied: {KC_LALT,KC_BSPC}
|
VIA Code copied: {KC_LALT,KC_BSPC}
|
| Toggle Clip | Toggle a clip on/off |
VIA Code copied: {KC_LSFT,KC_LGUI,KC_E}
|
VIA Code copied: {KC_LSFT,KC_E}
|
| Apply Transition | Apply a video transition |
VIA Code copied: {KC_LGUI,KC_D}
|
VIA Code copied: {KC_LCTL,KC_D}
|
| Add Edit | Add an edit at the playhead position |
VIA Code copied: {KC_LGUI,KC_K}
|
VIA Code copied: {KC_LCTL,KC_K}
|
| Audio Transition | Apply an audio transition |
VIA Code copied: {KC_LSFT,KC_LGUI,KC_D}
|
VIA Code copied: {KC_LCTL,KC_LSFT,KC_D}
|
| Duplicate | Duplicate item |
VIA Code copied: {KC_LSFT,KC_LGUI,KC_SLSH}
|
VIA Code copied: {KC_LCTL,KC_LSFT,KC_SLSH}
|
| Group Clips | Group selected clips |
VIA Code copied: {KC_LGUI,KC_G}
|
VIA Code copied: {KC_LCTL,KC_G}
|
| Add Caption Track | Add a new caption track |
VIA Code copied: {KC_LALT,KC_LGUI,KC_A}
|
VIA Code copied: {KC_LCTL,KC_LALT,KC_A}
|
| Add Caption At Playhead | Add a new caption at the playhead position |
VIA Code copied: {KC_LALT,KC_LGUI,KC_C}
|
VIA Code copied: {KC_LCTL,KC_LALT,KC_C}
|
| Rev. Match Frame | Reverse Match Frame |
VIA Code copied: {KC_LSFT,KC_R}
|
VIA Code copied: {KC_LSFT,KC_R}
|
| Ungroup Clips | Ungroup selected clip group |
VIA Code copied: {KC_LSFT,KC_LGUI,KC_G}
|
VIA Code copied: {KC_LCTL,KC_LSFT,KC_G}
|
| Next Caption | Go to next caption segment |
VIA Code copied: {KC_LALT,KC_LGUI,KC_DOWN}
|
VIA Code copied: {KC_LCTL,KC_LALT,KC_DOWN}
|
| Previous Caption | Go to previous caption segment |
VIA Code copied: {KC_LALT,KC_LGUI,KC_UP}
|
VIA Code copied: {KC_LCTL,KC_LALT,KC_UP}
|
| Make Subsequence | Make subsequence |
VIA Code copied: {KC_LGUI,KC_U}
|
VIA Code copied: {KC_LCTL,KC_U}
|
| Default Transition | Apply Default Transitions to Selection |
VIA Code copied: {KC_LSFT,KC_D}
|
VIA Code copied: {KC_LSFT,KC_D}
|
| Speed/Duration | Edit the clip speed/duration |
VIA Code copied: {KC_LGUI,KC_R}
|
VIA Code copied: {KC_LCTL,KC_R}
|
| Del. Markers | Clear all the markers |
VIA Code copied: {KC_LALT,KC_LGUI,KC_M}
|
VIA Code copied: {KC_LCTL,KC_LALT,KC_LSFT,KC_M}
|
| Clear In/Out | Clear the in/out points |
VIA Code copied: {KC_LALT,KC_X}
|
VIA Code copied: {KC_LCTL,KC_LSFT,KC_X}
|
| Make Subclip | Make a subclip |
VIA Code copied: {KC_LGUI,KC_U}
|
VIA Code copied: {KC_LCTL,KC_U}
|
| Edit All Tracks | Apply edit to all tracks at playhead position |
VIA Code copied: {KC_LSFT,KC_LGUI,KC_K}
|
VIA Code copied: {KC_LCTL,KC_LSFT,KC_K}
|
| Shortcut Hotkey | Description | MacOS VIA Macro | Windows VIA Macro |
|---|---|---|---|
| Auto Settings | Automatically adjusts the tone of the image to improve balance |
VIA Code copied: {KC_LGUI,KC_U}
|
VIA Code copied: {KC_LCTL,KC_U}
|
| Auto White Bal. | Automatically adjusts the white balance of the image |
VIA Code copied: {KC_LGUI,KC_LSFT,KC_U}
|
VIA Code copied: {KC_LCTL,KC_LSFT,KC_U}
|
| Edit in Photoshop | Edit the currently selected image in Photoshop |
VIA Code copied: {KC_LGUI,KC_E}
|
VIA Code copied: {KC_LCTL,KC_E}
|
| New Snapshot | Create a new snapshot of the selected image's settings |
VIA Code copied: {KC_LGUI,KC_N}
|
VIA Code copied: {KC_LCTL,KC_N}
|
| New Mask | Toggle the Masking menu |
VIA Code copied: {KC_LSFT,KC_W}
|
VIA Code copied: {KC_LSFT,KC_W}
|
| Copy Settings | Open the Copy Settings dialogue box |
VIA Code copied: {KC_LGUI,KC_LSFT,KC_C}
|
VIA Code copied: {KC_LCTL,KC_LSFT,KC_C}
|
| Paste Settings | Apply the copied settings to the selected image |
VIA Code copied: {KC_LGUI,KC_LSFT,KC_V}
|
VIA Code copied: {KC_LCTL,KC_LSFT,KC_V}
|
| Export | Export the selected photo(s) |
VIA Code copied: {KC_LGUI,KC_LSFT,KC_E}
|
VIA Code copied: {KC_LCTL,KC_LSFT,KC_E}
|
| Reset Settings | Reset all settings for the currently selected image |
VIA Code copied: {KC_LGUI,KC_LSFT,KC_R}
|
VIA Code copied: {KC_LCTL,KC_LSFT,KC_R}
|
| Enhance Photo | Open the Enhance settings to improve the image quality using AI |
VIA Code copied: {KC_LCTL,KC_LALT,KC_I}
|
VIA Code copied: {KC_LCTL,KC_LALT,KC_I}
|
| Print Module | Go to the Print Module |
VIA Code copied: {KC_LGUI,KC_LALT,KC_6}
|
VIA Code copied: {KC_LCTL,KC_LALT,KC_6}
|
| Reset Crop | Reset the crop of the selected image |
VIA Code copied: {KC_LGUI,KC_LALT,KC_R}
|
VIA Code copied: {KC_LCTL,KC_LALT,KC_R}
|
| Radial Gradient | Create a new Radial Gradient Mask |
VIA Code copied: {KC_LSFT,KC_M}
|
VIA Code copied: {KC_LSFT,KC_M}
|
| Import | Import Photos and Videos |
VIA Code copied: {KC_LGUI,KC_LSFT,KC_I}
|
VIA Code copied: {KC_LCTL,KC_LSFT,KC_I}
|
| Toggle Filter | Toggle the Filters On/Off |
VIA Code copied: {KC_LGUI,KC_L}
|
VIA Code copied: {KC_LCTL,KC_L}
|
| Zoom Out | Zoom out from the image |
VIA Code copied: {KC_LGUI,KC_MINS}
|
VIA Code copied: {KC_LCTL,KC_MINS}
|
| Zoom In | Zoom in to the image |
VIA Code copied: {KC_LGUI,KC_EQL}
|
VIA Code copied: {KC_LCTL,KC_EQL}
|
| Rotate Left | Rotate the photo left (Counterclockwise) |
VIA Code copied: {KC_LGUI,KC_LBRC}
|
VIA Code copied: {KC_LCTL,KC_LBRC}
|
| Rotate Right | Rotate the photo right (Clockwise) |
VIA Code copied: {KC_LGUI,KC_RBRC}
|
VIA Code copied: {KC_LCTL,KC_RBRC}
|
| Save Quick Collection | Open the Save Quick Collection dialogue box |
VIA Code copied: {KC_LGUI,KC_LALT,KC_B}
|
VIA Code copied: {KC_LCTL,KC_LALT,KC_B}
|
| Undo Action | Undo the last action |
VIA Code copied: {KC_LGUI,KC_Z}
|
VIA Code copied: {KC_LCTL,KC_Z}
|
| Redo Action | Redo the last undo action |
VIA Code copied: {KC_LGUI,KC_LSFT,KC_S}
|
VIA Code copied: {KC_LCTL,KC_LSFT,KC_S}
|
| Shortcut Hotkey | Description | MacOS VIA Macro |
|---|---|---|
| Compound Clip | Create a New Compound Clip |
VIA Code copied: {KC_LALT,KC_G}
|
| Enhance Light & Color | Automatically enhances the Light and Color in your clips (Final Cut Pro 10.8 and newer) |
VIA Code copied: {KC_LCTL,KC_LALT,KC_LGUI,KC_O}
|
| Project Snapshot | Take a Snapshot of the current Project, saving its current state within the Project file |
VIA Code copied: {KC_LSFT,KC_LGUI,KC_D}
|
| Paste Attributes | Paste copied attributes and their settings to the selection |
VIA Code copied: {KC_LSFT,KC_LGUI,KC_V}
|
| Cut Clips At Playhead | Cut all clips at the skimmer or playhead location |
VIA Code copied: {KC_LSFT,KC_LGUI,KC_B}
|
| Undo Action | Undo the last command |
VIA Code copied: {KC_LGUI,KC_Z}
|
| Redo Action | Redo the last command |
VIA Code copied: {KC_LGUI,KC_LSFT,KC_S}
|
| Toggle Library | Toggle Show/Hide the Library & Browser module |
VIA Code copied: {KC_LCTL,KC_LGUI,KC_1}
|
| Time to Range | Trims the clip start and end points to match the range selection. |
VIA Code copied: {KC_LALT,KC_BSLS}
|
| Create Storyline | Create a storyline from a selection of connected clips that don’t overlap |
VIA Code copied: {KC_LGUI,KC_G}
|
| Play Full Screen | Play full screen from the skimmer or playhead position |
VIA Code copied: {KC_LSFT,KC_LGUI,KC_F}
|
| Import Media | Opens the Media Import dialogue box |
VIA Code copied: {KC_LGUI,KC_I}
|
| New Event | Creates a new event |
VIA Code copied: {KC_LALT,KC_N}
|
| New Project | Creates a new project |
VIA Code copied: {KC_LGUI,KC_N}
|
| Export File | Opens the Export File dialogue box |
VIA Code copied: {KC_LGUI,KC_E}
|
| Timeline Scrolling | Scrolls the timeline in line with the playhead during playback |
VIA Code copied: {KC_LALT,KC_LSFT,KC_S}
|
| Transitions Browser | Toggle Show/Hide the Transitions Browser |
VIA Code copied: {KC_LCTL,KC_LGUI,KC_5}
|
| Retime Edit | Toggle Show/Hide the Retime Editor |
VIA Code copied: {KC_LGUI,KC_R}
|
| Zoom In Timeline | Zoom in to the browser, viewer, or timeline |
VIA Code copied: {KC_LGUI,KC_EQL}
|
| Zoom Out Timeline | Zoom out of the browser, viewer, or timeline |
VIA Code copied: {KC_LGUI,KC_MINS}
|
| Add Connect Title | Connect a basic title to the primary storyline |
VIA Code copied: {KC_LCTL,KC_T}
|
| Insert Gap Clip | Inserts a gap clip at the skimmer or playhead location |
VIA Code copied: {KC_LALT,KC_W}
|
| Shortcut Hotkey | Description | MacOS VIA Macro | Windows VIA Macro |
|---|---|---|---|
| Copy Attributes | Copy a clip/object or its attributes |
VIA Code copied: {KC_LGUI,KC_C}
|
VIA Code copied: {KC_LCTL,KC_C}
|
| Paste Attributes | Open Paste Attributes dialogue box, allowing you to paste specific settings |
VIA Code copied: {KC_LALT, KC_V}
|
VIA Code copied: {KC_LALT,KC_V}
|
| Split Clip | Split all the clips at the playhead position |
VIA Code copied: {KC_LGUI,KC_BSLS}
|
VIA Code copied: {KC_LCTL,KC_BSLS}
|
| Timeline Zoom | Toggle between showing the timeline in its entirety and the previous timeline zoom level |
VIA Code copied: {KC_LSFT,KC_Z}
|
VIA Code copied: {KC_LSFT,KC_Z}
|
| Transition | Add a transition at the selected edit points |
VIA Code copied: {KC_LGUI,KC_T}
|
VIA Code copied: {KC_LCTL,KC_T}
|
| Undo Step | Undo the last action |
VIA Code copied: {KC_LGUI,KC_Z}
|
VIA Code copied: {KC_LCTL,KC_Z}
|
| Redo Step | Redo the last undone action |
VIA Code copied: {KC_LGUI,KC_LSFT,KC_Z}
|
VIA Code copied: {KC_LCTL,KC_LSFT,KC_Z}
|
| Join Clips | Join the selected clips |
VIA Code copied: {KC_LALT,KC_BSLS}
|
VIA Code copied: {KC_LALT,KC_BSLS}
|
| Select All Clips Forward | Select all clips (on all tracks) after the playhead position |
VIA Code copied: {KC_LALT,KC_Y}
|
VIA Code copied: {KC_LALT,KC_Y}
|
| Link Clips | Link all the selected clips |
VIA Code copied: {KC_LALT,KC_LGUI,KC_L}
|
VIA Code copied: {KC_LALT,KC_LCTL,KC_L}
|
| Video Scopes | Toggle on/off the Video Scopes window |
VIA Code copied: {KC_LGUI,KC_LSFT,KC_W}
|
VIA Code copied: {KC_LCTL,KC_LSFT,KC_W}
|
| New Bin | Create a new bin (in Media panel) |
VIA Code copied: {KC_LGUI,KC_LSFT,KC_N}
|
VIA Code copied: {KC_LCTL,KC_LSFT,KC_N}
|
| New Timeline | Create a new timeline (in the Cut, Edit, or Fairlight panels) |
VIA Code copied: {KC_LGUI,KC_N}
|
VIA Code copied: {KC_LCTL,KC_N}
|
| Retime Controls | Toggle the Retime controls for the selected clip (in the Edit panel) |
VIA Code copied: {KC_LGUI,KC_R}
|
VIA Code copied: {KC_LCTL,KC_R}
|
| Ripple Overwrite | Perform a ripple overwrite |
VIA Code copied: {KC_LSFT, KC_F10}
|
VIA Code copied: {KC_LSFT, KC_F10}
|
| Trim Start | Trim the start of the clip to the playhead position |
VIA Code copied: {KC_LSFT, KC_LBRC}
|
VIA Code copied: {KC_LSFT, KC_LBRC}
|
| Trim End | Trim the end of the clip to the playhead position |
VIA Code copied: {KC_LSFT, KC_RBRC}
|
VIA Code copied: {KC_LSFT, KC_RBRC}
|
| Previous Node | Move to the previous node (Color panel) |
VIA Code copied: {KC_LALT,KC_LSFT,KC_SCLN}
|
VIA Code copied: {KC_LALT,KC_LSFT,KC_SCLN}
|
| Next Node | Move to the next node (Color panel) |
VIA Code copied: {KC_LALT,KC_LSFT,KC_QUOT}
|
VIA Code copied: {KC_LALT,KC_LSFT,KC_QUOT}
|
| Add Node | Add a new serial node after the selected node (Color panel) |
VIA Code copied: {KC_LALT,KC_S}
|
VIA Code copied: {KC_LALT,KC_S}
|
| Toggle Node | Toggle the selected Node on or off (Color panel) |
VIA Code copied: {KC_LGUI,KC_D}
|
VIA Code copied: {KC_LCTL,KC_D}
|
| Play In to Out | Play the timeline from the In to Out range |
VIA Code copied: {KC_LALT,KC_SLSH}
|
VIA Code copied: {KC_LALT,KC_SLSH}
|